
My Crazy Obsession With Chalk Paint... OR...How I Spent My Summer Vacation.

For those who know me even a little you would know my obsession with Annie Sloan Chalk Paint has gotten waaaay out of hand. In fact there are family members who have suggested that they are concerned for me and my mental well being when I run out of things to paint. Well luckily that day is not here yet. So I thought I would share my obsession and take you through step by step my latest Annie Sloan Chalk Paint project as I repurpose someone else's junk, two old side tables into my personal treasure...all while not spilling a drop of rosé..
THINGS YOU WILL NEED.

An old, crappy piece of furniture, Annie Sloan Chalk Paint and Clear Wax, painter's tape or frog tape (better than masking tape), various size brushes, screwdriver to remove hardware (or in my case a kitchen knife), metallic spray paint or silver leaf and adhesive, an old rag and a good imagination (or stolen imagination on Pinterest). I have literally gone happily MORE THAN ONCE to the Muskoka dump ( I call it Dumpster Diving) and brought back junk, to the look of horror of all those around me, painted it and it now proudly sits at our cottage. Some of the pieces are even in my London home.
THE BEFORE
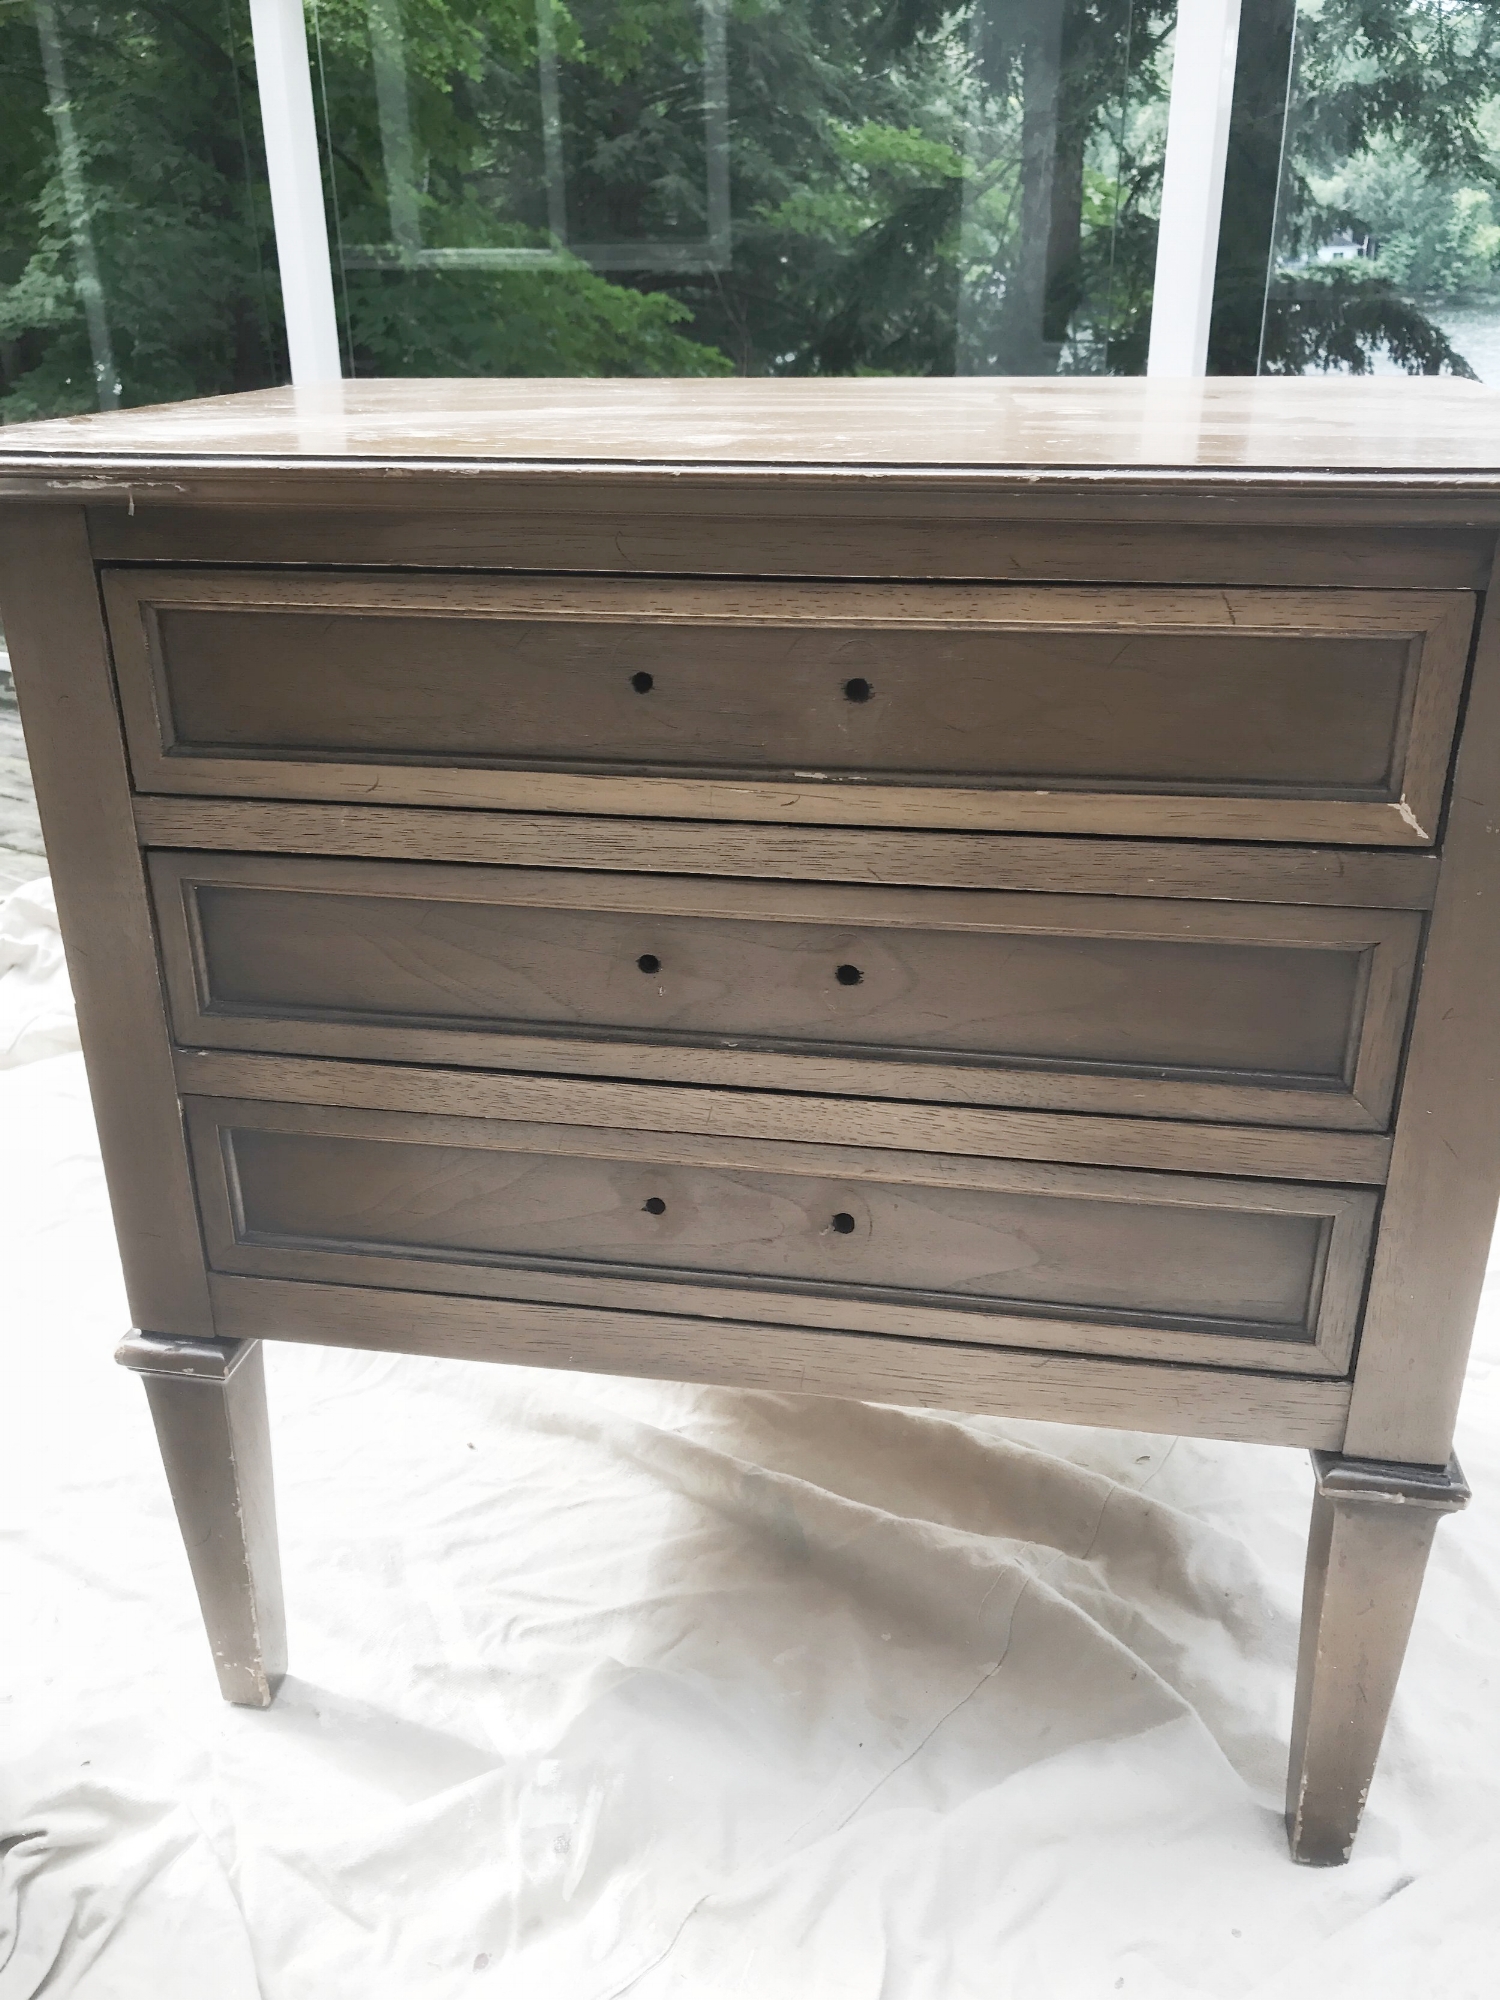
I FORGOT TO TAKE A PHOTO WITH THE BRASS HANDLES ATTACHED BUT I THINK YOU WILL GET THE IDEA .
STEP BY STEP


First, after deciding on Paris Grey as my main colour and wanting a tone on tone contrast I mixed Paris Grey with Pure White (2:1) to give me the middle stripe colour. I removed the hardware. Instead of taking out a measuring tape (way too much math whilst sipping rosé) I used various pieces of painters tape or frog tape to measure out from the holes of the handles exactly where and how wide I wanted my centre stripe. Make sure your tape is smoothed down especially at the edge as you don't want paint seeping under the tape.

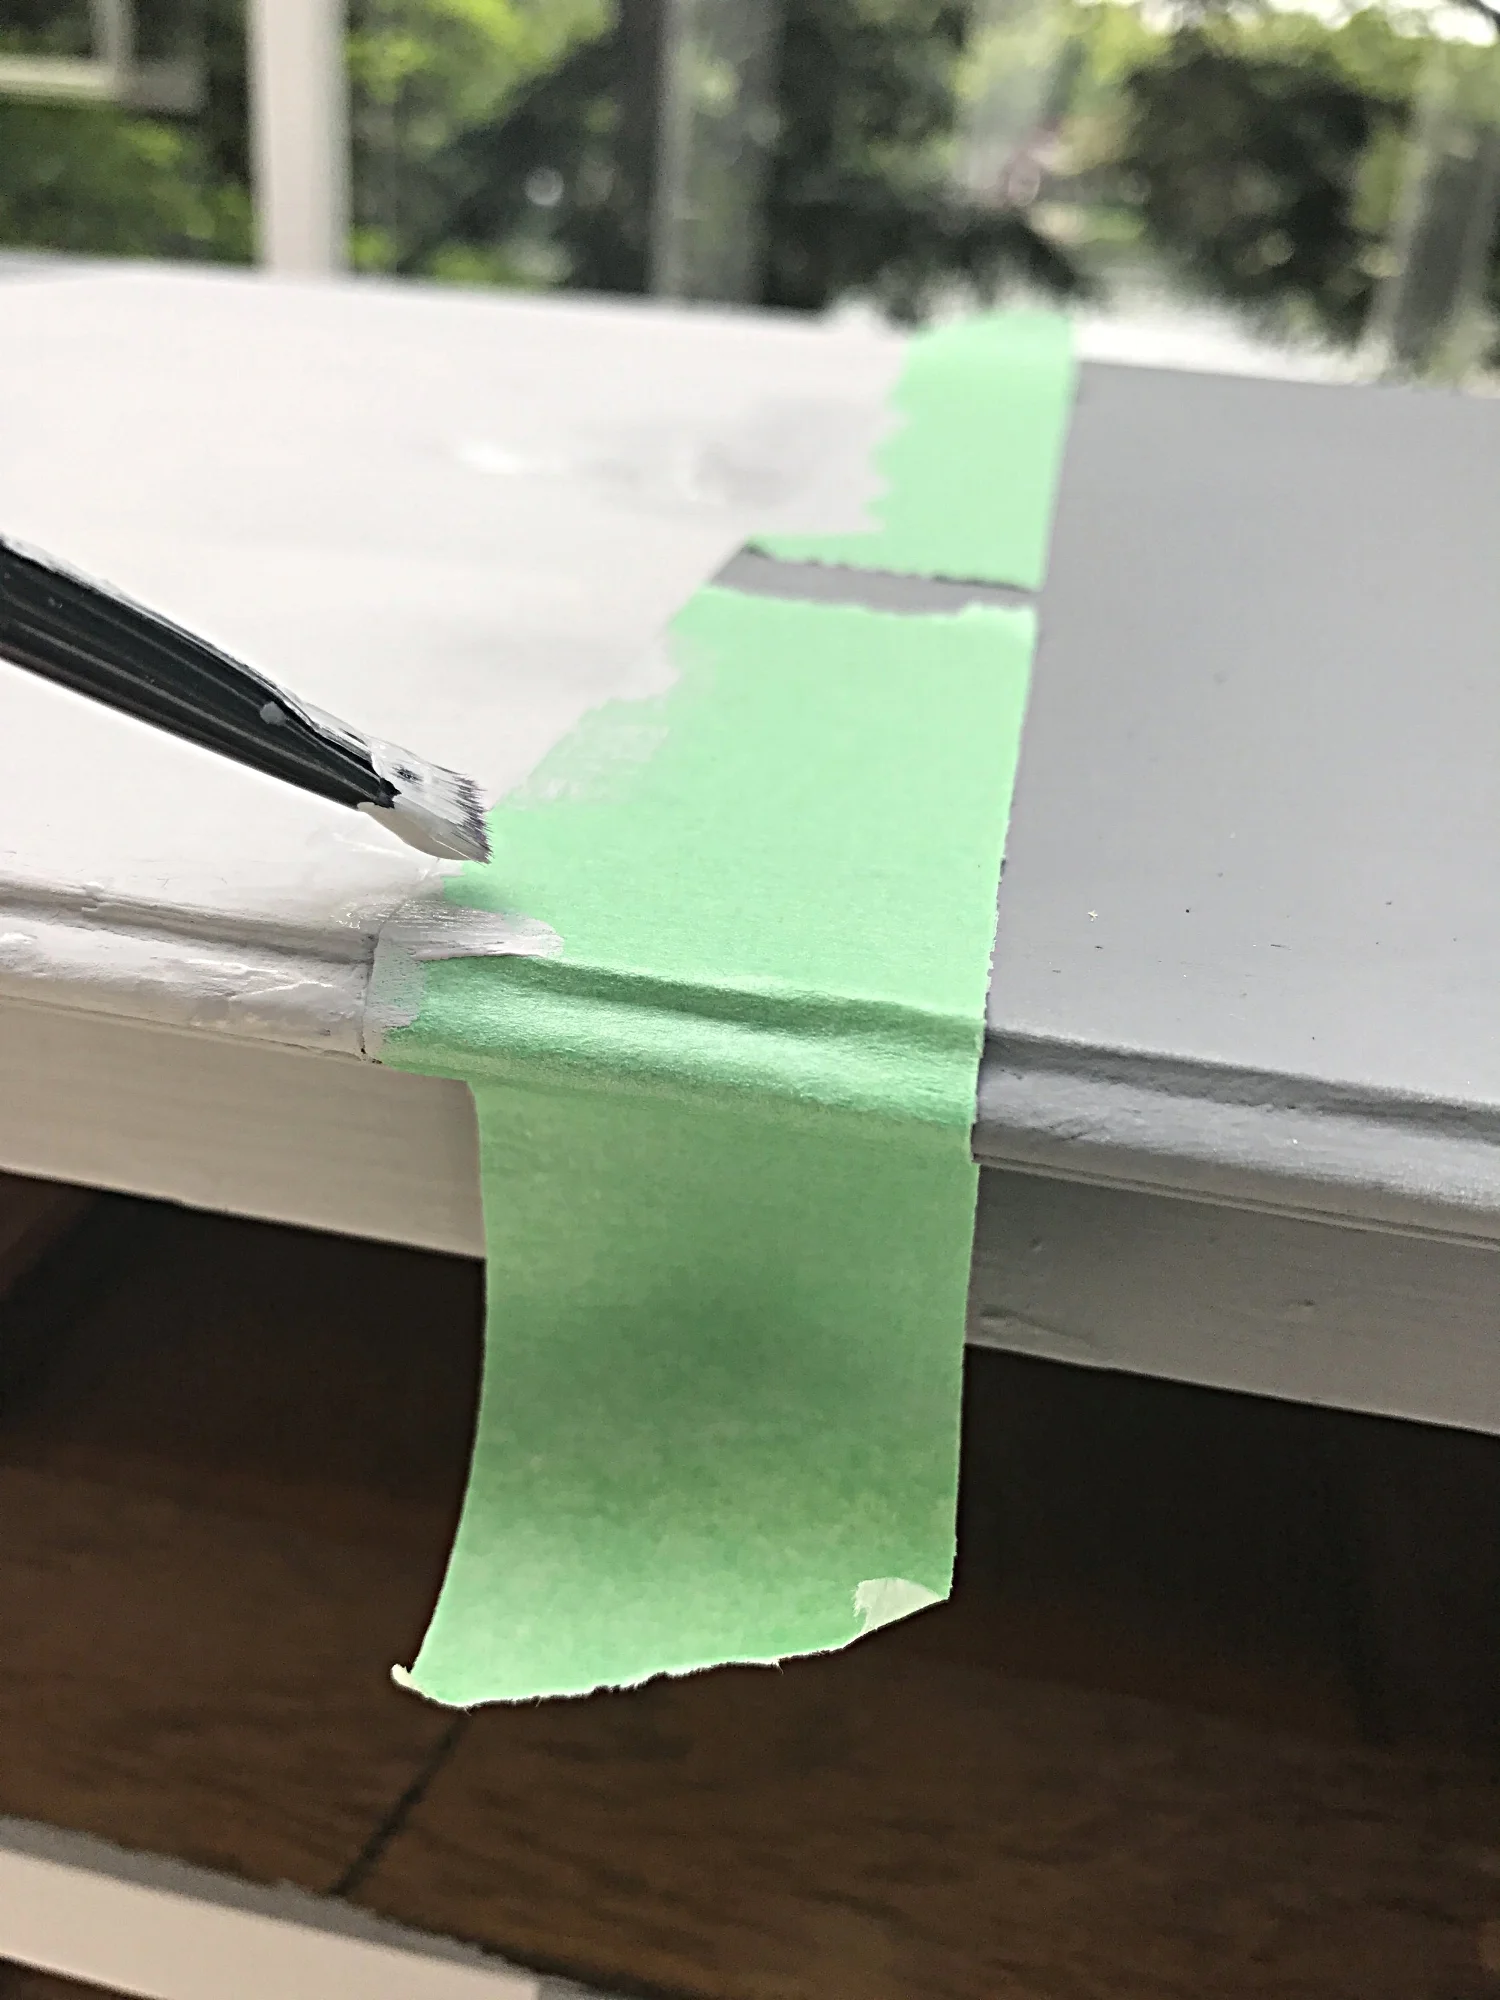
Painting from the tape outwards.
I then painted my centre stripe area. A good tip I have learned when painting stripes or straight lines is always start with a brush with slightly less paint and work your way from on top of the tape outwards, not towards it. One of the many amazing things about chalk paint (and the list is long) is you do not have to sand or prep the item you are painting, it dries very quickly and it is amazingly forgiving. Just make sure your item is clean.

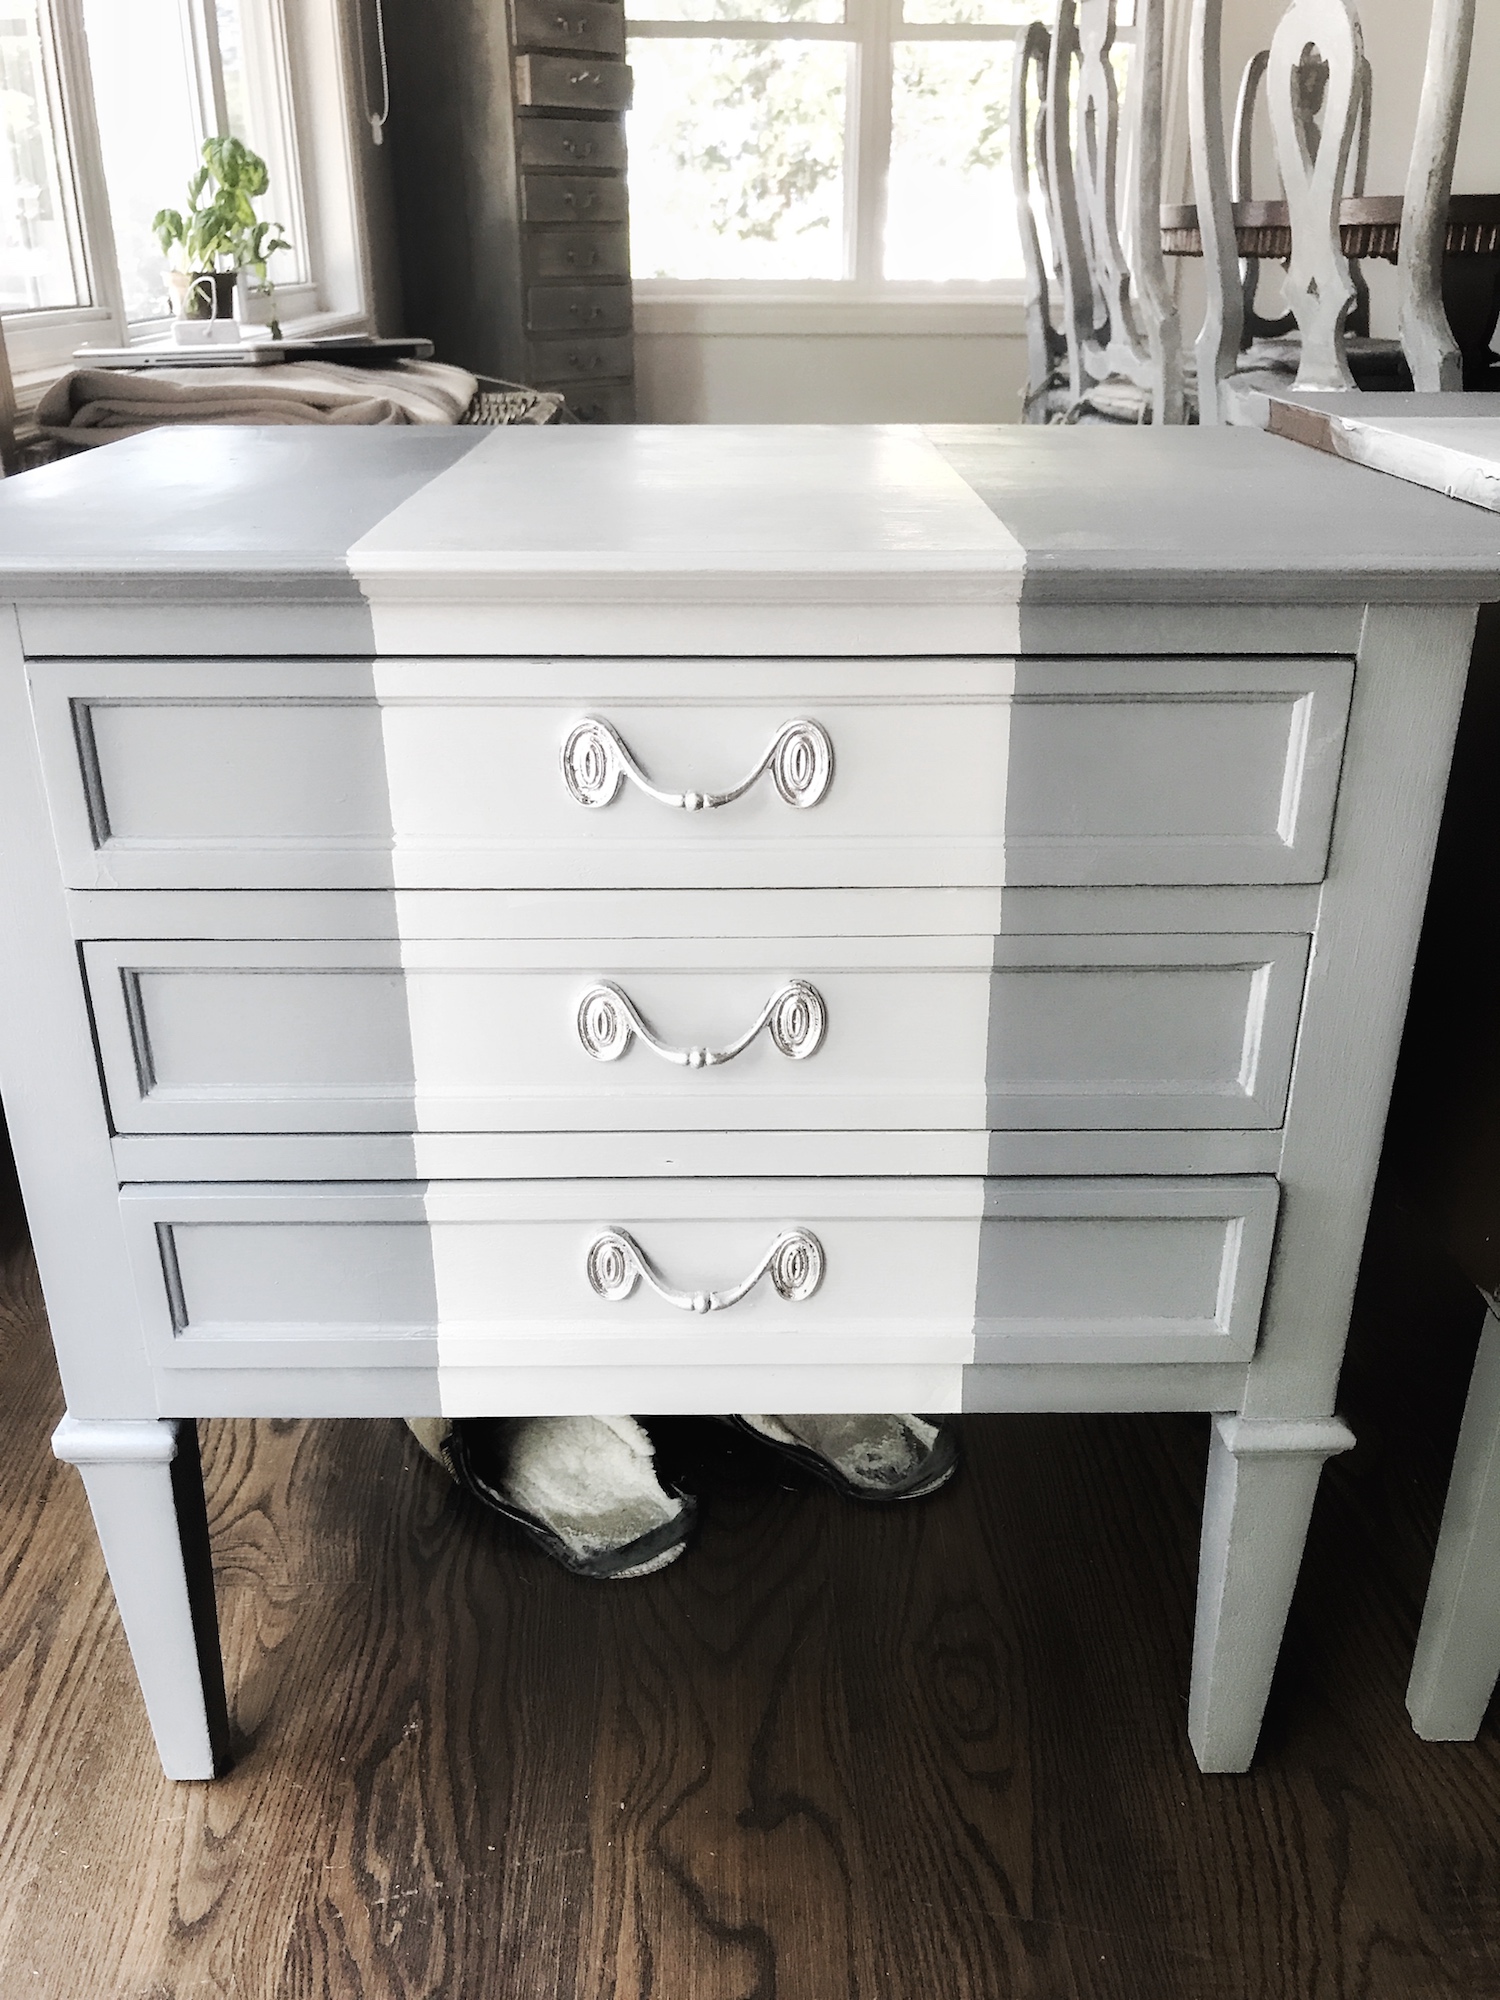
I then went on to paint the main colour over the rest of the side-table. I also painted the insides of the drawers with my light grey paint mixture and the sides of the drawers with Paris Grey. I think it makes a huge difference to finishing your piece when you open it and everything looks clean and finished.

REFINISHING THE HARDWARE

There a few options you can do to refinish the hardware. You could just paint them. Chalk paint will cover them nicely. You can also buy some metallic spray paint which I have done many times before on other projects and give them a spray (in a well ventilated area). The smell is harsh. But on this project I wasn't loving the finish I was getting from the spray paint (see top right photo below), not all spray paint is created equal so I opted for using silver leaf, a tad more challenging.

You can buy silver or gold leaf at Michael's or any craft store. You will also need two small brushes and adhesive that is made to attach the leaf. You brush on the adhesive to everywhere you want the leaf to adhere to. You wait about half an hour until it is a little tacky and with your hands gentle lay the leaf over the hardware. It is a delicate process as the leaf is very thin and tears easily. You will then use your second clean brush to pat down the leaf and brush away lose bits. Do not do this in a windy spot, all your silver leaf will blow away.
WAXING OR FINISHING YOUR MASTERPIECE

With either a Annie Sloan waxing brush (makes it easier for large surfaces) or a clean rag apply a thin coat of clear wax over your dry painted surface. With a clean rag remove and rub in the wax so the painted surface is free of access wax. The wax seals and gives a good finish to the paint.
ALMOST THERE... FINAL TOUCH-UPS

So I am almost there. They have been painted, waxed and the hardware has been silver leafed, all on a quiet day at the cottage. If you look carefully on the side table to the right you can see areas that I touched up with paint. Ideally touch ups should be done before waxing but this was not the case here. Easily fixed, I just waxed those areas again.

TA DA!!!!! MY FINISHED SIDE TABLE
(please excuse the slippers under the table. They are definitely not mine. Ugh)
And so.... that is how I spent my summer vacation.... If you have any questions or if you have so been inspired to dive into the world of repurposing furniture by way of chalk paint please share with me your works of art. Love to see them. I am giving you fair warning though...it is highly addictive.
Now back to my regularly scheduled favourite summertime activity.

You guessed it. It is Rosé time.